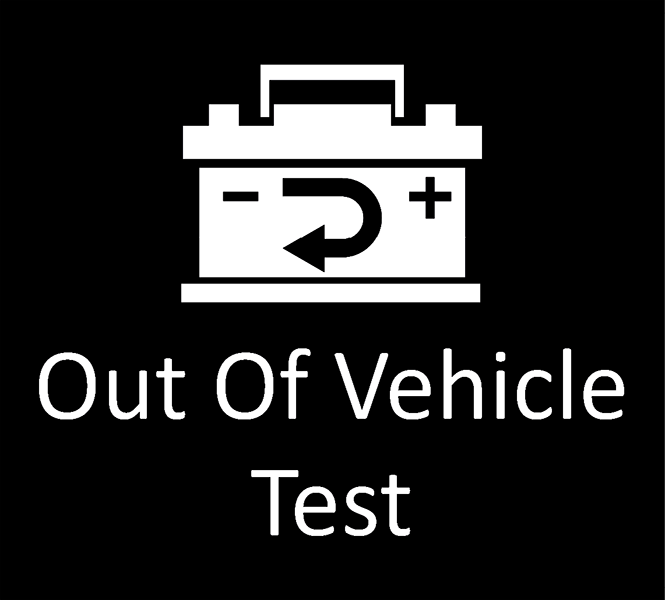
Use Out of Vehicle Test to perform Battery Tests on batteries that are out of the vehicle. This will still require a VIN to be entered, either through the barcode scanner or via manual entry. The battery parameters will be pre-populated based on the VIN scan or can be manually entered.
1.) Connect – Tester clamps to battery terminals
2.) Select – At the Main Menu, select Out of Vehicle Test
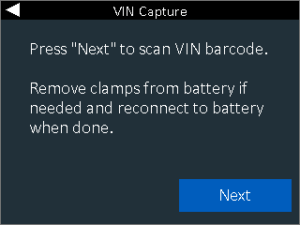
3.) VIN Capture – Scan the VIN of the vehicle via the built in barcode scanner or manually enter the VIN number via the keypad.
4.) Vehicle confirmation – If the vehicle is in the tool’s database, it will display the year make and model as well as the captured VIN
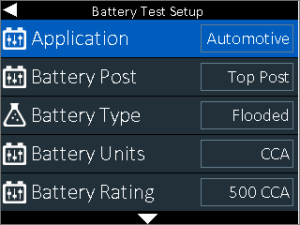
5.) Battery Test Setup – This information will be pre-populated for Honda or Acura vehicles if the information is known, but can be manually edited or selected if you are testing a non-Honda or non-Acura vehicle
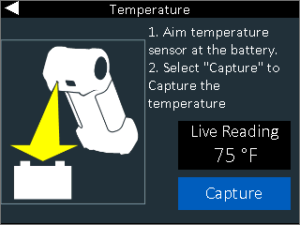
6.) Temperature – Hold sensor 6 to 12 inches over the battery and select capture to record the battery’s temperature
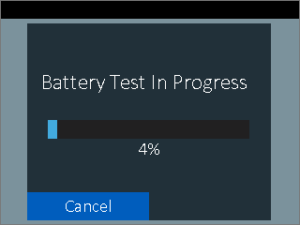
7.) Battery Test – The CPX-900 will start with a voltage check. If the tool senses an elevated voltage, it will begin to apply a load to bring the voltage down into an expected range. If after 30 seconds it cannot be brought down, it will recommend to use the DCA-8000 diagnostic charger for analysis. If there is not an elevated voltage or once the elevated voltage is brought down, the test starts with a conductance test, followed by a 10A load applied for 60 seconds to check for reserve capacity via Midtronics’ Conductance Profiling™ technology
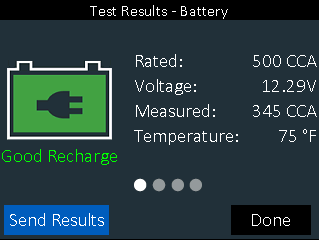
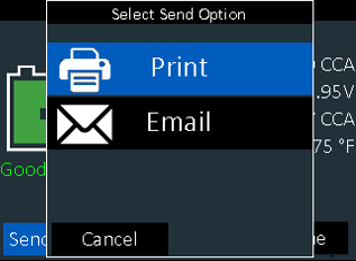
8.) Results – You will see the overall result displayed on the first page. Scrolling right on the keypad by pressing the right button takes you to the cranking decision, followed by the reserve health result. The last screen will provide the battery code. From the first screen you may choose to print to the onboard printer or send an email of the result, proceed to a system test, or selecting done will return you to the home screen.